Maintaining a pristine lawn requires not only regular mowing but also ensuring the safety of yourself and others.
One important aspect of lawn care is the management of debris discharge from the mower.
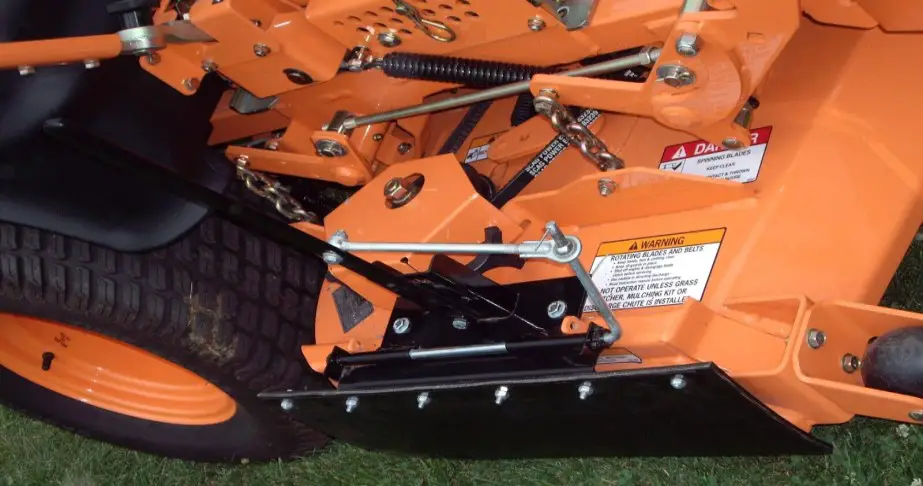
Discharge chute blockers are an essential tool in this regard, as they prevent dangerous projectiles and enhance efficiency.
They’re devices installed on lawn mowers to redirect or block the ejection of grass clippings, leaves, and other debris
Step-by-Step Guide: How to Make Your Discharge Chute Blocker
Building your DIY discharge chute blocker isn’t only a cost-effective alternative but also a rewarding project that allows you to customize the design to suit your specific needs.
With just a few basic tools and materials, you can create a functional and efficient blocker for your lawn mower.
Step 1: Get the Necessary Materials
To begin, gather the following tools and materials.
Sturdy sheet of metal or plastic
Choose a material that’s durable and resistant to the elements.
Metal, such as aluminum or steel, is often preferred for its strength, but high-density plastic can also be a suitable option.
Drill
A drill will be necessary for creating holes in the material and attaching it to your mower.
Bolts and nuts
These will be used to secure the discharge chute blocker to your mower. Make sure to select appropriate sizes that fit snugly and securely.
Related: How to Build a Homemade Lawn Mower Discharge Chute
Step 2: Construct Your Discharge Chute
Now, let’s dive into the step-by-step process of constructing a basic DIY discharge chute blocker.
By following these instructions, you’ll be able to create a functional and efficient blocker for your lawn mower.
Measure and cut the material
Begin by measuring the dimensions of your mower’s discharge chute using a tape measure.
You want to ensure that the blocker is wide enough to effectively block debris while still allowing sufficient airflow for the mower to operate efficiently.
Mark the measurements on the sheet of metal or plastic using a pencil or marker.
Cut the material
With the measurements marked, use appropriate tools like a jigsaw or metal shears to cut the sheet of metal or plastic to the desired size and shape.
Take care to follow the marked lines accurately for a precise fit.
Create mounting holes
Once the material is cut to size, you’ll need to create mounting holes to attach the discharge chute blocker to your mower.
Using a drill and a drill bit suitable for the material, carefully create holes in the blocker that align with the existing holes or mounting points on your mower’s discharge chute.
Ensure that the holes are positioned in a way that allows for a secure attachment without interfering with the mower’s operation.
Prepare your mower for installation
Thoroughly clean the mower’s discharge chute before installation to remove any debris or grass clippings. This will help prevent clogs and ensure smooth operation.
Depending on the design of your blocker, you may need to adjust the cutting height of your mower.
Follow the manufacturer’s instructions or refer to your mower’s manual to make the necessary adjustments.
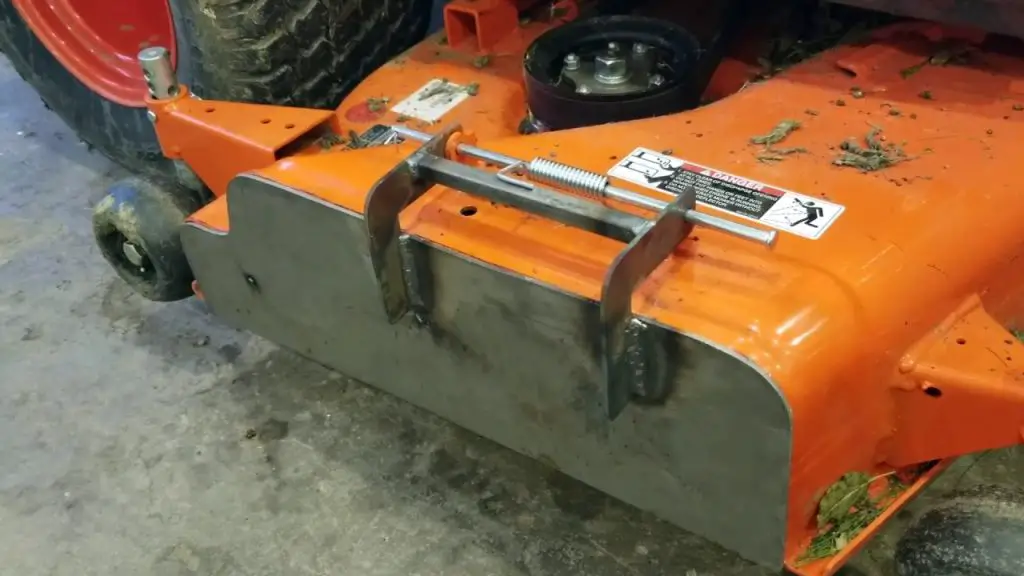
Attach the blocker to the mower
Line up the holes in the discharge chute blocker with the corresponding holes on the mower’s discharge chute.
Insert bolts through the holes from the inside of the discharge chute blocker, and secure them with nuts on the opposite side.
Use the appropriate wrench or socket to tighten the nuts firmly, but be cautious not to overtighten and damage the material or the mower.
Make sure the blocker is securely fastened to the discharge chute.
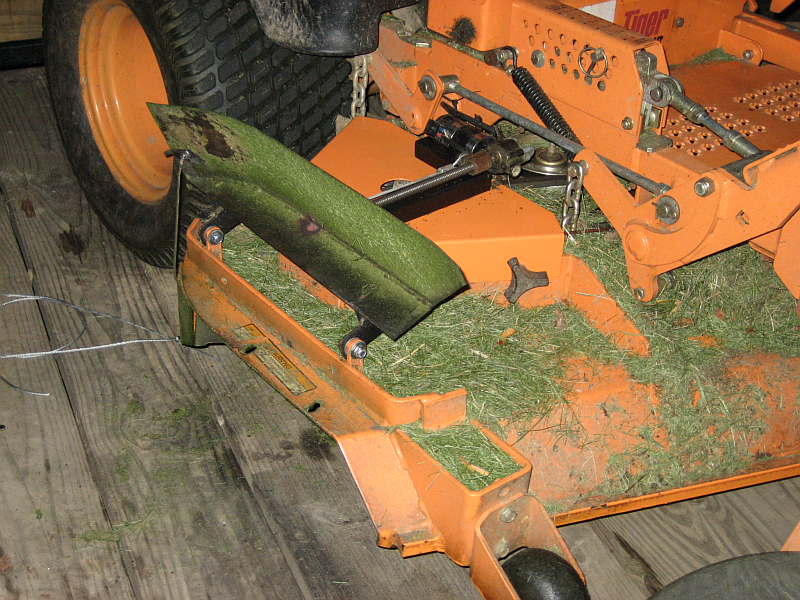
Test the functionality
With the discharge chute blocker installed, start the mower and observe how it performs. Pay attention to how the blocker redirects or blocks debris from being ejected.
Ensure that it effectively prevents debris from scattering while not impeding the mower’s operation or causing excessive buildup of clippings.
Make any necessary adjustments if the blocker is not functioning optimally.
Related: Dump Trailer Hydraulic Fluid: What You Must Know
Advanced DIY Modifications to Consider
Once you’ve mastered the basic construction of the discharge chute blocker, you can explore advanced options and modifications to further improve its functionality.
These modifications can offer added convenience and versatility to enhance your lawn care experience.
Here are some potential ideas to consider.
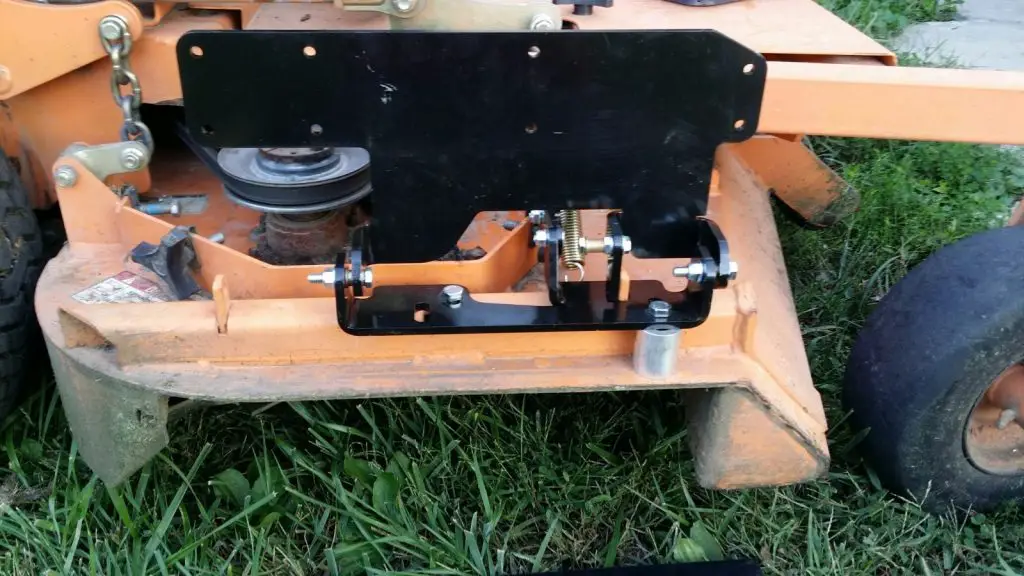
Adjustable designs
Incorporating hinges or sliding mechanisms into your blocker can allow you to adjust its angle or height.
This feature enables you to adapt to different mowing conditions or personal preferences.
For example, you can tilt the blocker to redirect the debris more precisely or adjust the height to accommodate varying grass lengths.
Removable blockers
Creating a design that allows for easy removal and installation of the discharge chute blocker can provide added flexibility when transitioning between different lawn care tasks.
For instance, you can remove the blocker when mowing open areas where debris dispersal is not a concern and attach it when mowing near flower beds or other sensitive areas where debris containment is necessary.
Dual-function blockers
Consider incorporating additional features into your DIY discharge chute blocker to enhance its versatility.
For example, you could design a blocker that includes a mulching insert, allowing you to switch between mulching and discharge modes without having to remove the entire blocker.
This feature reduces the need for separate attachments and enhances the convenience of your lawn care routine.
Customized debris management systems
Depending on your specific needs and preferences, you can integrate your discharge chute blocker with a customized debris management system.
This could involve designing an attachment that connects the blocker to a collection bag or a debris container mounted on your mower.
This system collects and contains the debris efficiently, eliminating the need for manual raking or additional clean-up after mowing.
Related: Best Blades for Ferris ICD Deck
Common Issues & their Solutions
During the construction process, you may encounter some challenges that can be easily resolved.
Fit and alignment
Ensure that the discharge chute blocker aligns properly with the mower’s discharge chute and that the mounting holes are in the correct position.
Double-check measurements and make adjustments as necessary.
Material durability
Choose a sturdy material that can withstand the rigors of lawn mowing.
If the blocker shows signs of bending or warping during use, consider using thicker or more resilient materials.
Secure attachment
Verify that the bolts and nuts used to attach the blocker are tightened securely. Loose fittings can result in the blocker shifting or detaching during operation.
Related
- How to Make a Homemade Lawn Mower Discharge Chute
- How to Change Hydraulic Fluid on Dump Trailers (4 Steps)
- Best Mower for 7 Acres
- Best Pressure Washers Under $600
- How Does a Pressure Washer Unloader Valve Work? (Answered)
- Top 3 Types of Lawn Mower Engines
- Ryobi Vs Craftsman Pressure Washer
- Ariens Vs Husqvarna Zero Turn Mowers
- Sutech Stealth 33 Review: Don’t Buy Until You Read This
- Best Commercial Lawn Mower Brands
- Qwikchute vs. Grass Flap: Which One is Better?
- Mulch Kit or Chute Blocker: Which is Better?

